没有GUI的系统是没有灵魂的。选Windows Server又要多花钱,而Linux又一言难尽。本文包括了Debian 9升级Debian 10、图形化界面安装(GNOME)、VNC的安装(RealVNC)。
一、升级系统
更新系统到Debian 10,如果不愿意更新系统可以直接执行sudo apt-get -y update跳过更新系统这一步。
1.备份源
cp /etc/apt/sources.list /etc/apt/sources.list.bak
2.更新源
将Debian 9的源更新成Debian 10
sed -i 's/stretch/buster/g' /etc/apt/sources.list
sed -i 's/jessie/stretch/g' /etc/apt/sources.list
3.更新
sudo apt-get -y update && sudo apt-get -y upgrade && sudo apt-get -y dist-upgrade && sudo apt-get -y full-upgrade
更新过程会有询问,按要求选yes(或填写Y或选第一项)就可以了,过程时间比较长耐心等待。
4.清理并重启
sudo apt -y autoremove && reboot
二、安装图形化界面
2020.11.10注:可以通过安装task-gnome-desktop直接完成图形化界面安装.
sudo apt-get -y install task-gnome-desktop
1.安装xorg以及GNOME
注意先后顺序。
sudo apt-get -y install xorg
sudo apt-get install gnome -y
2.默认图形化启动
systemctl set-default graphical.target
3.允许root登录
vim使用方法自行查找。
①.修改gdm-password,也有可能是gdm-passwd
vi /etc/pam.d/gdm-password
开头添加#注释掉auth required pam_succeed_if.so user != root quiet_success ,一般在第三行
②.修改gdm-autologin
vi /etc/pam.d/gdm-autologin
同上、开头添加#注释掉auth required pam_succeed_if.so user != root quiet_success
③.修改daemon.conf,也有可能是custom.conf
vi /etc/gdm3/daemon.conf
在 [security]下面添加一行
AllowRoot=true
4.重启
reboot重启,安装结束。
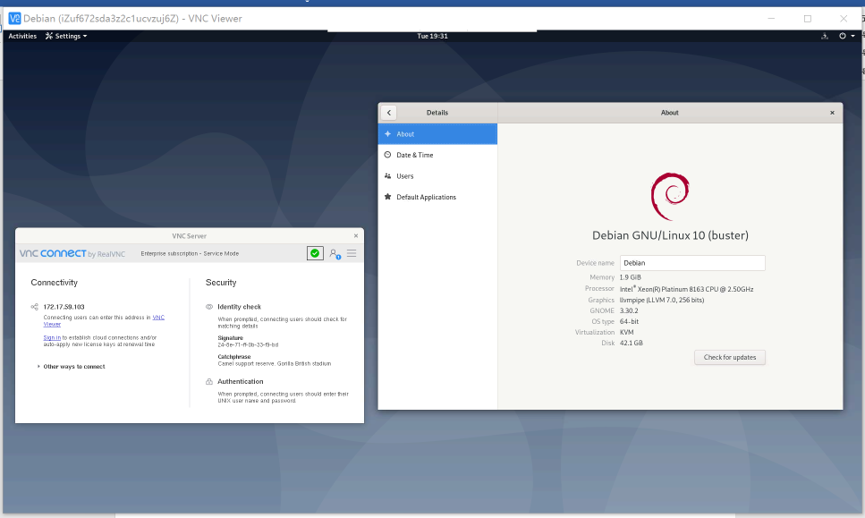
三、安装VNC
安装vncserver这里使用的是RealVNC。其它系统的vncserver请到RealVNC官网下载。
默认端口5900,用户名root,密码root账户的密码。
1.下载安装
# curl -L -o realvncserver.deb https://www.realvnc.com/connect/download/binary/latest/debian/64-bit/ # 7.x 不支持传统 License key
curl -L -o realvncserver.deb https://downloads.realvnc.com/download/file/vnc.files/VNC-Server-6.11.0-Linux-x64.deb
dpkg -i realvncserver.deb
2.添加License key
此key源自互联网。
sudo vnclicense -add VETPD-HHC3S-63AH9-YAA26-8WVDA
3.启动和添加开机启动
systemctl start vncserver-x11-serviced.service && systemctl enable vncserver-x11-serviced.service
自此,安装结束。
四、解决问题
VNC连接后出现Cannot currently show the desktop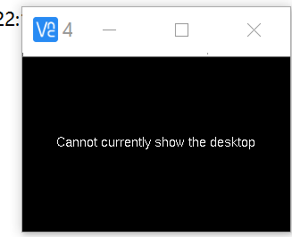
运行loginctl确定会话编号和其他详细信息
root@iZuf672sda3z2c1ucvzuj6Z:~# loginctl
SESSION UID USER       SEAT  TTY
2       0   root
c1      118 Debian-gdm seat0 tty1

2 sessions listed.
发现一个奇怪的用户Debian-gdm,使用以下命令找出正在运行的会话类型(将c1替换为您的实际会话号)。
root@iZuf672sda3z2c1ucvzuj6Z:~# loginctl show-session c1 -p Type
Type=x11
类型x11,问题应该就是出现在这里了,虽然不知道为什么会这样,但目前解决这种情况的方法是,让root账户自动登录,即修改/etc/gdm3/daemon.conf
vi /etc/gdm3/daemon.conf
[daemon]
# Uncomment the line below to force the login screen to use Xorg
#WaylandEnable=false

# Enabling automatic login
AutomaticLoginEnable = true
AutomaticLogin = root
# Enabling timed login
TimedLoginEnable = true
TimedLogin = root
TimedLoginDelay = 0
……
将AutomaticLogin…和TimeLogin…等五行前面的#去掉,然后修改参数和上面一致,其余地方不做修改。
最后重启reboot,问题解决。
注:这个解决方案的存在缺点,在VNC Viewer下无法切换用户,一旦切换用户就会黑屏=.=
后记
1.本方法也可用于Ubuntu,不过Ubuntu可能需要额外修改一个文件/root/.profile(一般是root账户登录时的问题)
vim /root/.profile
#mesg n || true
tty -s && mesg n || true
找到mesg n 在前面加上tty -s&&。位置一般在文件结尾。
2.关于连接黑屏。
网络上给出的解决方案是禁用Wayland。具体方法是修改/etc/gdm3/daemon.conf(也有可能是custom.conf)。将daemon.conf中的#WaylandEnable=false前面的#号去掉。并在下面添加一行DefaultSession=gnome-xorg.desktop(也有可能只去掉注释不同添加)即
WaylandEnable=false
DefaultSession=gnome-xorg.desktop
理由是 Wayland是一种安全的显示协议以及实现协议的库,可实现视频硬件(服务器)与客户端(系统上的每个应用程序)之间的通信。 Wayland是默认的GNOME显示服务器。如果您注意到某些应用程序在Wayland中未按预期运行,则可以切换到X11中的 GNOME
3.还有一个安装GUI方法就是使用tasksel安装,目前没有测试。感兴趣的话可以自行尝试。
sudo apt-get install tasksel -y
sudo tasksel
4.gnome桌面图标显示。显示桌面图标需要额外安装一个扩展
sudo apt-get install -y gnome-shell-extension-desktop-icons
并在gnome-tweaks(优化),在extensions(扩展)中启动Desktop icons

文章有(3)条网友点评
其实也没那么麻烦,。已经解决了。
还是黑屏
@ eee 直接采用sudo apt-get -y install task-gnome-desktop安装图形化界面gnome就好了(也可以尝试安装其他的图形化界面如kde、xfce等),不必在手动安装xorg。此外,如果你配置正确,当连接vnc黑屏时,你再同时连接一个ssh,然后执行startx(需要root权限),vnc就会正常显示…